How to install detectron2 on Windows Machine?
A Step-by-Step Guide to Installing Detectron2 on Your Windows System.

I build, write and explore around AI, data, and technology. Sometimes it’s experiments, sometimes it’s just reflections. All of it helps me learn.
Last year, I was experimenting with detectron2 on my windows system. It was a wild ride, to say the least, as I encountered a barrage of confusing error messages and seemingly endless trial-and-error attempts. But after days of pure determination and unwavering passion for technology, I finally succeeded in installing detectron2! Although I wasn't entirely certain about the process, I was ecstatic to have successfully installed detectron2. To help others avoid the same experience I went through, I wrote a simple and concise blog, documenting every step. I hope to make the process of installing detectron2 a breeze for the wider tech community, and spread the love for this amazing tool!

What is Detectron2?
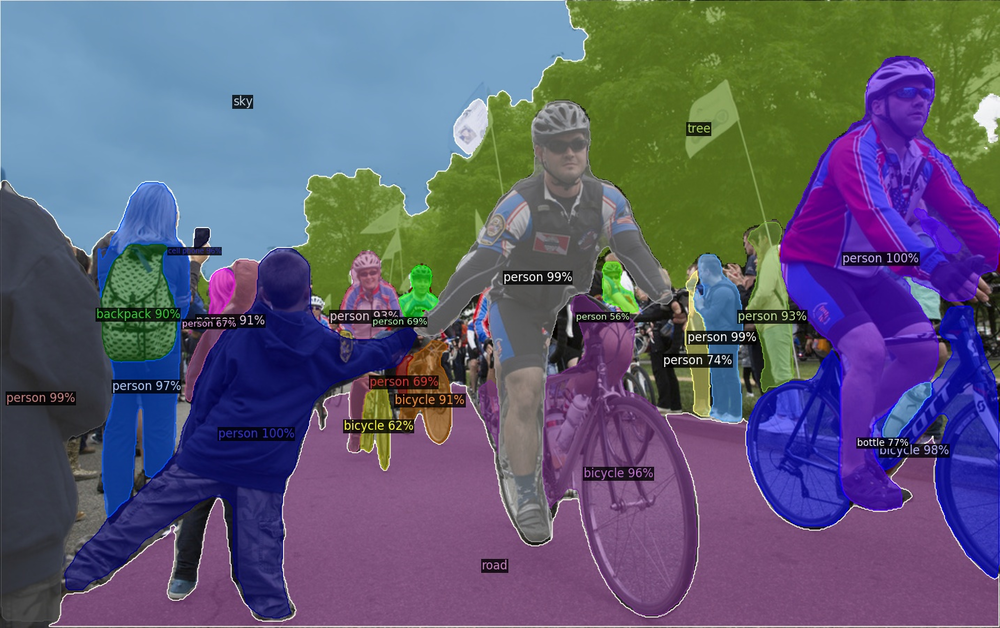
Detectron2 is a powerful and flexible software platform for object detection and image segmentation. It is developed by Facebook AI Research and is designed to be easy to use and scalable, making it a popular choice for researchers, engineers, and data scientists who work with computer vision and machine learning. Detectron2 is built on the PyTorch framework and is designed to be compatible with other popular machine-learning libraries, making it a versatile tool for a wide range of use cases. With its ability to handle large datasets and perform complex image processing tasks, Detectron2 is a valuable tool for tasks such as autonomous vehicle navigation, medical imaging analysis, and security surveillance. Whether you are working on a research project or developing a commercial application, Detectron2 is an essential tool for anyone working in the field of computer vision.
Installation of required dependencies
Step 1. Anaconda
Download the Anaconda installer from the official website (https://www.anaconda.com/products/distribution).
Run the installer, selecting the appropriate options for your system (e.g. selecting the installation location).
Step 2. Visual Studio Build Tools
Visual Studio Build Tools allow you to build Visual Studio projects from the command line. You can download the latest Visual Studio Build Tools version from the Microsoft website. link for the official website here.

Download the community version installer by clicking on Free Download.
Run the installer, and the somewhat following screen will show up as shown below image:

click on install and wait for the installation to be finished.
Step 3. Microsoft Visual C++ Build Tools
Download the Microsoft Visual C++ Build Tools installer from the official website (Microsoft Visual C++ Build Tools installer link).

Download the installer by clicking on Download Build Tools, Run the installer, and the somewhat following screen will show up as shown below image:

Make sure Desktop development with C++ is checked, as shown in the image below:
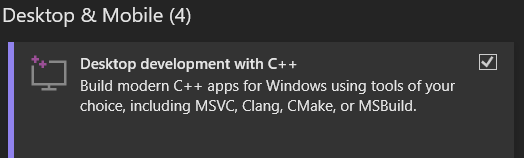
After checking that checklist will appear on the right side of the screen, as shown in below image:

Make sure your checklist matches the image above. I am using Windows 11 here, if you are on windows 10 then check Windows 10 SDK.
Now begin installation by clicking on the option at the bottom right of the window.
After Installation is completed check if it got installed properly.
How to check if Microsoft Visual C++ is installed or not?
open the following path:
control panel >> Programs >> Programs and Features
Look for Microsoft Visual C++, it will show up here if the installation is successful. After this Please restart your system once.
building 'detectron2._C' extension error: Microsoft Visual C++ 14.0 or greater is required. Get it with "Microsoft C++ Build Tools": https://visualstudio.microsoft.com/visual-cpp-build-tools/
above shown is a very frequent error we get when we start building the detectron2 from the git repo. so this installation is important.
Note: if you have any older versions, you will need to delete them. in case you are getting errors related to Microsoft Visual C++ 14.0 or greater is required.
Beginning the detectron2 installation using the anaconda prompt
Create a new conda environment
Note: if you have already created a conda environment skip this step and activate your environment!
conda create --name detectron_env python=3.9
Activate your new environment
conda activate detectron_env
Install the required dependencies
- Without GPU (If you want to install detectron2 on a system which is not having GPU)
Here's a command for the installation of all dependencies.
pip install torch==1.13.1 torchvision==0.14.1 Cython==0.29.33 opencv-python==4.7.0.68 matplotlib==3.6.3 PyYAML==6.0 protobuf==4.21.12 ninja==1.11.1
- With GPU (If you have GPU follow this)
Please note that CUDA and cuDNN, components must be installed separately, as they are not available on the Python Package Index. You can download the latest version of CUDA and cuDNN from the NVIDIA website (https://developer.nvidia.com/cuda-downloads).
Alternative linkAfter you have installed CUDA and cuDNN, you can install the PyTorch GPU version using the following command:
pip install torch torchvision torchaudio -f https://download.pytorch.org/whl/cu11.0/torch_stable.htmlThis command will install the latest version of PyTorch with GPU support for CUDA 11.0. If you have a different version of CUDA installed, you will need to modify the URL to match the appropriate version.
After the above step install the remaining dependencies
pip install Cython==0.29.33 opencv-python==4.7.0.68 matplotlib==3.6.3 PyYAML==6.0 protobuf==4.21.12 ninja==1.11.1
Clone the detectron2 repository from GitHub
This is used to clone the detectron2 repository from GitHub to your local machine. The git clone command is used to download a copy of the source code of a project from a remote repository (in this case, the repository is hosted on GitHub and is maintained by Facebook Research). This will allow you to have a local copy of the source code on your machine that you can work with.
git clone https://github.com/facebookresearch/detectron2.git
Build the detectron2 package
cd detectron2, which is used to navigate into the cloned detectron2 repository directory. The cd command is used to change the current directory in the terminal, and in this case, you are moving into the directory where the detectron2 source code is stored.
cd detectron2
python setup.py build develop, is used to build the detectron2 package. The python setup.py command is used to build and install packages in Python. In this case, you are using the build and develop options, which are used to build the package and create a symbolic link to the source code in the current directory. This allows you to develop and make changes to the source code without having to reinstall the package every time you make changes.
python setup.py build develop
Finally, install detectron2 using pip
pip install -e ., is used to install the detectron2 package using pip. The pip install command is used to install packages in Python, and the -e option is used to install the package in "editable" mode, which means that any changes you make to the source code will be reflected in the installed package. The . at the end of the line is used to specify the current directory, which is where the detectron2 source code is located.
pip install -e .
Test the installation is successful
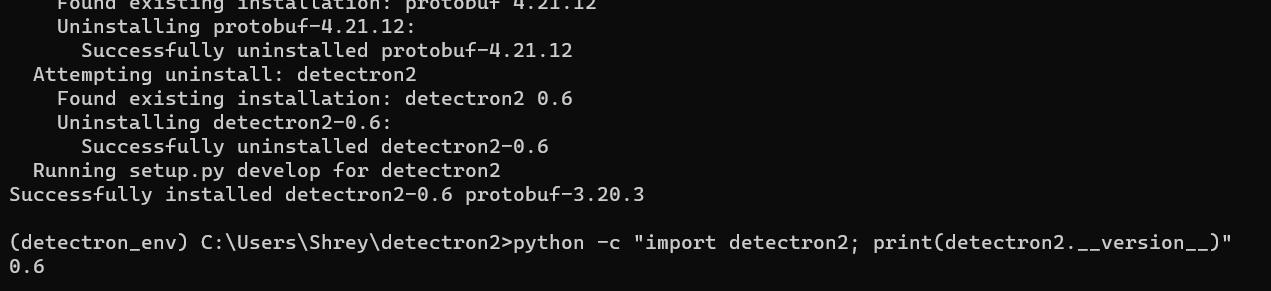
python -c "import detectron2; print(detectron2.__version__)", is used to test that the installation of detectron2 was successful. The python -c command is used to run a Python command from the terminal, and in this case, you are importing the detectron2 package and printing its version number. If the installation was successful, this command should return the version number of the detectron2 package. If there are any issues with the installation, an error message will be displayed.
python -c "import detectron2; print(detectron2.__version__)"
Alternatively, you can use this notebook, to test the installation with a pre trained model.
Note: I have used Windows 11 and Python 3.9.16 for the installation. However, there may be different issues that arise during the installation process. If you encounter any difficulties and have ideas on how to resolve them, feel free to share them in the comments section. I will update this blog with your name as a contributor. Thank you!
By following this instruction, you can quickly avoid these issues and get Detectron2 up and running on your local system. Whether you're using a GPU or not, the installation process is straightforward, and the step-by-step guide is easy to follow. With the right dependencies installed, you'll be able to clone the detectron2 repository, build the package, and install it with pip. If you're having trouble with any of the steps, remember to check if Microsoft Visual C++ is installed properly and restart your system after installation. Finally, you can test your installation by importing the detectron2 package and printing its version. Good luck!
That's all for this time, Until Next Time Cheers!
you can always connect with me Here😃